Blurry and dark photos on my iPhone 15
When i take the photos from my i phone 15 it is show less detail with blurry image.
as well as dark
[Re-Titled by Moderator]
Original Title: Photo quality issues
iPhone 15, iOS 18
When i take the photos from my i phone 15 it is show less detail with blurry image.
as well as dark
[Re-Titled by Moderator]
Original Title: Photo quality issues
iPhone 15, iOS 18
I’ve actually had the same issue with my iPhone— especially when taking photos indoors or in low light. Even though the camera hardware is great, I noticed some photos still turn out a bit blurry or darker than expected, with less detail, particularly when shooting quickly or when the lens isn’t super clean.
Here's what worked for me:
I've had good results with 4DDiG Photo Enhancer — it sharpens blurry images and brings out detail without making the photo look unnatural. It's especially helpful when the original shot isn't re-takable.
So yeah, while the iPhone camera is powerful, it's still software-dependent — and sometimes you need a little extra help.
If your Photos and Videos are stored in iCloud and you share it before downloading the original then it may appear blurry but it is not.
Your photos and videos are stored on your device in their original, high-resolution version. This means that they use a lot of space on your iPhone, iPad, and iPod touch. With iCloud Photos, you can make more space available on your device and have your entire collection, everywhere you go.
Get started with iCloud Photos:
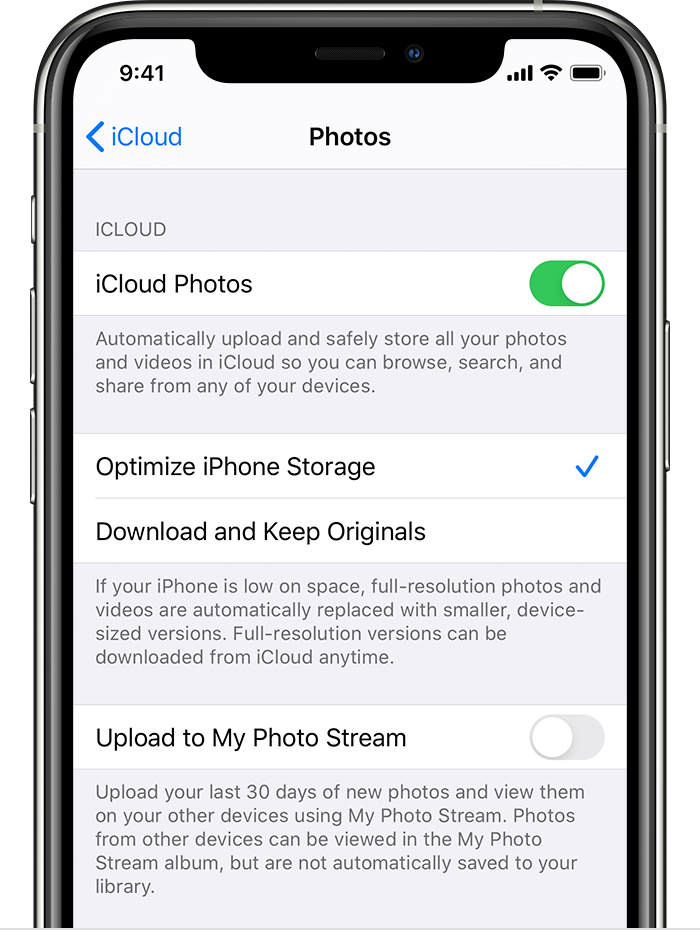
With Optimize Storage, smaller, space-saving photos and videos are kept on your device while all of your original, full-resolution versions are stored in iCloud. And as long as you have enough space in iCloud, you can store as many photos and videos as you want.

You may try some of these steps, please check after each step...
Lighting effects and needs
Lighting plays a crucial role when capturing indoor photos or videos as it greatly impacts the overall quality and aesthetics of the final result. Here are some reasons why lighting is essential in indoor photography and videography:
Considering these factors, investing time and effort into understanding and utilizing proper lighting techniques will significantly enhance the quality, impact, and overall aesthetic appeal of your indoor photos and videos.
Learn how to take photos with the Camera on your iPhone. Choose from camera modes such as Photo, Video, Cinematic, Pano, and Portrait, and zoom in or out to frame your shot.
Learn iPhone camera basics - Apple Support
Learn about Photographic Styles, QuickTake, Action mode, the Ultra Wide camera, and other camera features on your iPhone.
Understand About the Camera features on your iPhone - Apple Support (IN)
By default, iPhone takes photos in HDR (for the rear camera and the front camera) when it’s most effective. iPhone 12 models, iPhone 13 models, and iPhone 14 models, record video in HDR to capture true-to-life colour and contrast.
Take appropriate action to Adjust HDR camera settings on iPhone - Apple Support (IN)
The camera modes built into your iPhone, iPad, and iPod touch help you take the ideal photo or video. Swipe left or right on the camera screen to switch to a different mode. You can choose from photo, video, time-lapse, slo-mo, square, Portrait, and pano modes.
For this, you may Use camera modes on your iPhone, iPad, and iPod touch
With the Camera on models that support Portrait mode, you can apply a depth-of-field effect that keeps your subject—people, pets, objects, and more—sharp while creating a beautifully blurred foreground and background. You can apply and adjust different lighting effects to your Portrait mode photos, and on iPhone X and later, you can even take a selfie in Portrait mode.
Learn how to --> Take Portrait mode photos with your iPhone camera
Learn about advanced Camera features that let you capture photos faster, apply tailored and enhanced looks to your photos, and view content outside the camera frame.
Try to Change advanced camera settings on iPhone - Apple Support
Use the Camera to record videos and QuickTake videos on your iPhone. Learn how to change modes to take Cinematic, slow-motion, and time-lapse videos.
Here you can see an Apple Article with all video recording options --> Record videos with your iPhone camera - Apple Support
Taking tips from here may also help you. --> Tutorials | iPhone Photography School
Cinematic mode applies a depth-of-field effect that keeps the subject of your video sharp while creating a beautifully blurred foreground and background. iPhone ...
Record videos in Cinematic mode with your iPhone camera
Take a macro photo or video
Open Camera on your iPhone. Make sure Camera is in Photo or Video mode. Get close to the subject—as close as 2 centimeters. Camera will automatically switch to the Ultra Wide camera to enable macro photography.
Take macro photos and videos with your iPhone camera
Blurry and dark photos on my iPhone 15