What if I just want all my photos saved to my phone and Mac air and not on the cloud. How do I do that?

What if I want all of my photos saved to my phone and to my photos on my Mac air and not on the cloud. How do I do that?

Posted on Jun 21, 2023 08:15 PM

Reply
Question marked as Top-ranking reply

Posted on Jun 21, 2023 08:25 PM

Photos Import to your Mac:

You can import photos and videos to your Mac by connecting your device to your Mac. However, if you use iCloud Photos, then you don't need to import. 

To import to your Mac: 
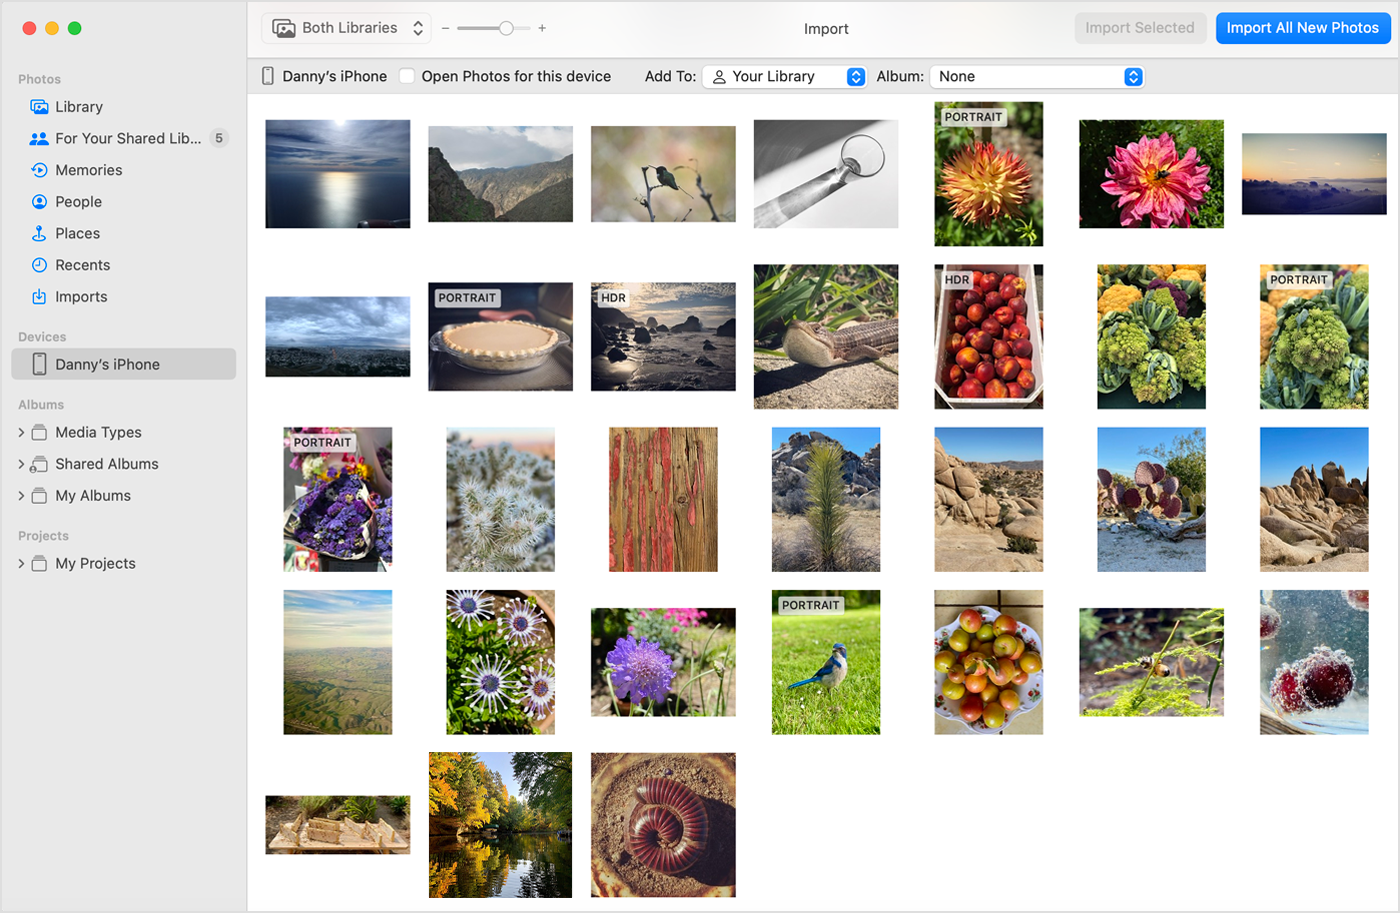
  1. Connect your iPhone or iPad to your Mac with a USB cable.
  2. Open the Photos app on your computer.
  3. The Photos app shows an Import screen with all the photos and videos that are on your connected device. If the Import screen doesn't automatically appear, click the device's name in the Photos sidebar.
  4. If asked, unlock your iOS or iPadOS device using your passcode. If you see a prompt on your iOS or iPadOS device asking you to Trust This Computer, tap Trust to continue.
  5. Choose where you want to import your photos. Next to "Import to," you can choose an existing album or create a new one.
  6. Select the photos you want to import and click Import Selected, or click Import All New Photos.


7.Wait for the process to finish, then disconnect your device from your Mac.


Import to your Windows PC

You can import photos to your PC by connecting your device to your computer and using the Windows Photos app:

  1. Update to the latest version of iTunes on your PC. Importing photos to your PC requires iTunes 12.5.1 or later.
  2. Connect your iPhone or iPad to your PC with a USB cable.
  3. If asked, unlock your iOS or iPadOS device using your passcode.
  4. If you see a prompt on your iOS or iPadOS device asking you to Trust This Computer, tap Trust or Allow to continue.

Then, visit Microsoft's website to learn how to import photos to the Windows Photos app in Windows 10 or Windows 11.

If you have iCloud Photos turned on, you need to download the original, full resolution versions of your photos to your iPhone or iPad before you import to your PC.

When you import videos from your iOS or iPadOS device to your PC, some might be rotated incorrectly in the Windows Photos app. You can add these videos to iTunes to play them in the correct orientation.

If you want to ensure photos from your iOS or iPadOS device have the best compatibility with Windows 10 or Windows 11, try these steps:

  1. On your iOS or iPadOS device, open the Settings app.
  2. Tap Camera, then tap Formats.
  3. Tap Most Compatible. From now on, your camera will create photos and videos in JPEG and H.264 formats.


More ways to transfer photos and videos to your computer

Transfer photos and videos from your iPhone or iPad to your Mac or PC - Apple Support


3 replies
Question marked as Top-ranking reply

Jun 21, 2023 08:25 PM in response to Helplessme2

Photos Import to your Mac:

You can import photos and videos to your Mac by connecting your device to your Mac. However, if you use iCloud Photos, then you don't need to import. 

To import to your Mac: 

  1. Connect your iPhone or iPad to your Mac with a USB cable.
  2. Open the Photos app on your computer.
  3. The Photos app shows an Import screen with all the photos and videos that are on your connected device. If the Import screen doesn't automatically appear, click the device's name in the Photos sidebar.
  4. If asked, unlock your iOS or iPadOS device using your passcode. If you see a prompt on your iOS or iPadOS device asking you to Trust This Computer, tap Trust to continue.
  5. Choose where you want to import your photos. Next to "Import to," you can choose an existing album or create a new one.
  6. Select the photos you want to import and click Import Selected, or click Import All New Photos.


7.Wait for the process to finish, then disconnect your device from your Mac.


Import to your Windows PC

You can import photos to your PC by connecting your device to your computer and using the Windows Photos app:

  1. Update to the latest version of iTunes on your PC. Importing photos to your PC requires iTunes 12.5.1 or later.
  2. Connect your iPhone or iPad to your PC with a USB cable.
  3. If asked, unlock your iOS or iPadOS device using your passcode.
  4. If you see a prompt on your iOS or iPadOS device asking you to Trust This Computer, tap Trust or Allow to continue.

Then, visit Microsoft's website to learn how to import photos to the Windows Photos app in Windows 10 or Windows 11.

If you have iCloud Photos turned on, you need to download the original, full resolution versions of your photos to your iPhone or iPad before you import to your PC.

When you import videos from your iOS or iPadOS device to your PC, some might be rotated incorrectly in the Windows Photos app. You can add these videos to iTunes to play them in the correct orientation.

If you want to ensure photos from your iOS or iPadOS device have the best compatibility with Windows 10 or Windows 11, try these steps:

  1. On your iOS or iPadOS device, open the Settings app.
  2. Tap Camera, then tap Formats.
  3. Tap Most Compatible. From now on, your camera will create photos and videos in JPEG and H.264 formats.


More ways to transfer photos and videos to your computer

Transfer photos and videos from your iPhone or iPad to your Mac or PC - Apple Support


Jun 21, 2023 08:26 PM in response to Helplessme2

Helplessmes Said:

"What if I just want all my photos saved to my phone and Mac air and not on the cloud. How do I do that?"

-------


Perform this on a Mac, as it would be more user-friendly doing so:


For future reference...

Finding Specific Filetypes from iCloud:

To search for specific filetypes in iCloud (i.e. all pdf documents), you would perform the following...


How this Works:

You would...

  1. Plug in: the External Hard Drive to a Mac.
  2. Download: all of iCloud to the External Hard Drive (using my user tip)
  3. Create: a folder on the External Hard Drive
  4. Search: for the images by filetype (enter the extension in the top-right corner of the Finder window).
  5. Drag & Drop: all of these found item to the folder (in step two)
  6. Move: the rest of the download to the Trash
  7. Delete: the files from the Trash
  8. Eject: the hard drive in a Finder window.

This thread has been closed by the system or the community team. You may vote for any posts you find helpful, or search the Community for additional answers.

What if I just want all my photos saved to my phone and Mac air and not on the cloud. How do I do that?

Welcome to Apple Support Community
A forum where Apple customers help each other with their products. Get started with your Apple Account.