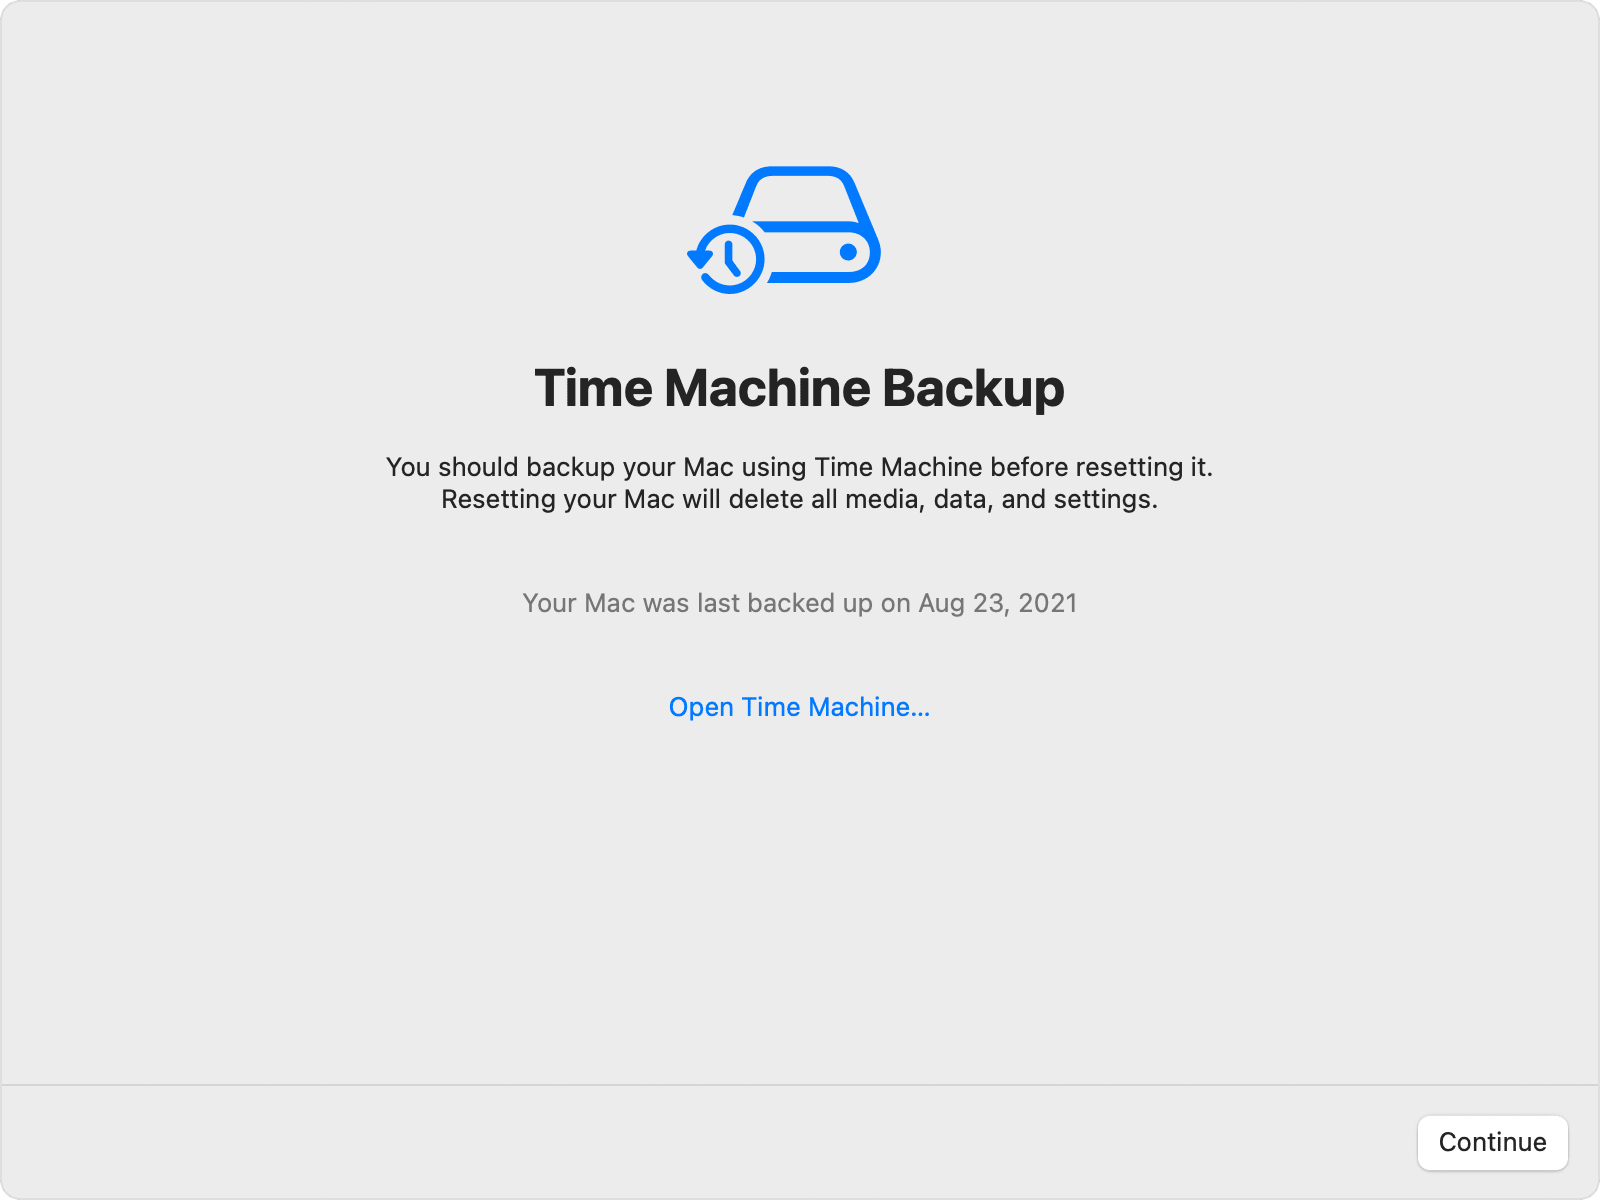
Disk erase failed

This is a MacBook Pro early 2013, running macOS Catalina 10.15.7.


I am trying to erase all of my private data and return it to factory settings so I can donate it.


I open Disk Utility. It’s display shows:


Apple SSD 2D512E…


   Container disk 1


      Macintosh HD


      Macintosh HD - Data


If I click on anything other than “Apple SSD 2D….”, the erase icon is greyed out.


So I click on the Apple SSD volume erase. After about 2 seconds, a message says: 


“Erasing ‘Apple SSD SD512E…’ 


Unmounting Disk


Couldn’t open device : (-69877) “


Operation failed…


Any ideas are greatly appreciated.

MacBook Pro 15″, macOS 10.15

Posted on Jan 17, 2023 3:59 PM

Reply
Question marked as Top-ranking reply

Posted on Jan 18, 2023 8:47 PM

Immediately after the failure, try repeating the procedure again. Once in a while for some unknown reason I have found this is necessary. It is just some of the quirkiness that Apple hardware & macOS have developed recently.


Make sure you are booted into Recovery Mode (Command + R), Internet Recovery Mode (Command + Option + R), or from a bootable macOS USB installer. You cannot erase a drive you are booted from.


In some cases with later versions of macOS, I have found that sometimes you must first unmount all volumes on the drive you are erasing. You may also need to first delete the "Macintosh HD" volume which may prompt you whether to also delete the "Volume Group" which you will want to allow if offered.


If you still have a problem erasing the SSD, then let me know since Disk Utility can sometimes have troubles if there is something wrong with the partition table on the drive. Just make sure to have a bootable macOS USB installer available while you can still make it using this Mac since a lot of people tend to have issues with accessing Internet Recovery Mode.


Similar questions

4 replies
Question marked as Top-ranking reply

Jan 18, 2023 8:47 PM in response to Claude Crider

Immediately after the failure, try repeating the procedure again. Once in a while for some unknown reason I have found this is necessary. It is just some of the quirkiness that Apple hardware & macOS have developed recently.


Make sure you are booted into Recovery Mode (Command + R), Internet Recovery Mode (Command + Option + R), or from a bootable macOS USB installer. You cannot erase a drive you are booted from.


In some cases with later versions of macOS, I have found that sometimes you must first unmount all volumes on the drive you are erasing. You may also need to first delete the "Macintosh HD" volume which may prompt you whether to also delete the "Volume Group" which you will want to allow if offered.


If you still have a problem erasing the SSD, then let me know since Disk Utility can sometimes have troubles if there is something wrong with the partition table on the drive. Just make sure to have a bootable macOS USB installer available while you can still make it using this Mac since a lot of people tend to have issues with accessing Internet Recovery Mode.


Jan 18, 2023 10:07 PM in response to allen_31

FYI:


An ATA Secure erase can work well (I use sometimes), but it usually requires a Linux boot disk and software, most times using the command line. Most average Mac users will not care for this option. Also, the ATA Secure Erase does not work on all Apple SSDs...it will usually work on most of the non-USB-C Apple SSDs. Yes, there is a paid version available with a GUI interface for the ATA Secure Erase, but it is best to try other options first. I did manage to brick one Apple SSD using the ATA Secure Erase option...I used the second variation which is for Self Encrypting SSDs, but the Apple SSD did not handle it well so an ATA Secure Erase is a bit risky if the wrong option is chosen.


There is no need for any extra software to securely erase an Apple SSD other than using Disk Utility to perform a simple erase. If for some reason Disk Utility cannot actually erase the drive, then just using the macOS command line to destroy the partition table should be enough to allow Disk Utility to finally erase the SSD (I didn't want to offer this option until the OP tried the other simpler tips as it is more complicated to provide detailed instructions).


When Disk Utility performs a simple erase, all the data on the SSD is instantly wiped due to how SSDs and TRIM work. You can easily confirm the SSD has been zeroed, by running the "xxd" command in the Terminal to view the raw contents of the SSD (not sure "xxd" is available in recovery mode). Of course you will see some data at the beginning of the SSD for the partition table and a few hidden files that macOS puts on all drives, but you will soon see that the rest of the SSD contains only zeroes (will show as dots in the text column) ...it may only show a line of zeroes then seemingly "hang", but this is just how the utility may handle all zeroes (or I may be mixing up "xxd" handling of this with the behavior of the Linux "hexdump" command which is similar to the macOS "xxd" utility.


Any other apps which actually write zeroes or random data to the SSD will just add premature wear to the SSD and may not even touch some NAND blocks due to how SSDs operate.

Jan 19, 2023 8:08 AM in response to Claude Crider

Hello Claude Crider,


Thank you for reaching out to Apple Support Communities, and we'll be happy to help in any way we can. We understand you're having issues with erasing your Mac. Try the steps here to see if they resolve the issue: Erase your Mac and reset it to factory settings - Apple Support


"Use Erase All Content and Settings

This feature requires macOS Monterey or later and a Mac with Apple silicon or the Apple T2 Security Chip. Learn what to do if you can't use Erase All Content and Settings.

macOS Ventura

  1. From the Apple menu  in the corner of your screen, choose System Settings.
  2. Click General in the sidebar.
  3. Click Transfer or Reset on the right.
  4. Click Erase All Content and Settings. Don't see this button?

macOS Monterey

  1. From the Apple menu  in the corner of your screen, choose System Preferences.
  2. From the System Preferences menu in the menu bar, choose Erase All Content and Settings. Don't see this option?


After choosing Erase All Content and Settings, follow these steps to continue:

  1. An erase assistant asks you to sign in with your administrator credentials. Enter the password that you use to log in to your Mac, then click OK. Forgot your login password?
  2. If you're asked to back up your Mac before resetting it, you can open Time Machine and back up to an external storage device. Or click Continue to proceed without making a new backup.
  3. macOS Erase All Content & Settings Time Machine Backup window
  4. Click Continue to allow your settings, media, data, and the other listed items to be removed.
  5. macOS Erase All Content & Settings window showing items that will also be removed
  6. If you're asked to sign out of Apple ID, enter your Apple ID password and click Continue. Forgot your Apple ID password?
  7. Click Erase All Content & Settings to confirm that you want to proceed.
  8. "You are about to erase all content and settings from this Mac" popup window
  9. Your Mac restarts and shows a black screen or progress bar. If it needs to reconnect to a Bluetooth accessory such as a keyboard or mouse, you might be asked to turn on the accessory. If the accessory doesn't connect within 30 seconds, turn the accessory off and back on. When reconnecting to a Bluetooth keyboard, you're asked to choose a language.
  10. You might be asked to select a Wi-Fi network or attach a network cable. To select a Wi-Fi network, use the Wi-Fi menu  in the upper-right corner of the screen. 
  11. After joining a network, your Mac activates. Click Restart.
  12. macOS  "Your Mac is activated" window
  13. After restart, a setup assistant guides you through the setup process, as if you're setting up your Mac for the first time.

  14. If you're selling, giving away, or trading-in your Mac and want to leave it in an out-of-box state, don't use the setup assistant or your previously connected Bluetooth devices, if any. Just press and hold the power button on your Mac until it turns off.


If you can't use Erase All Content and Settings

Erase All Content and Settings is available only in macOS Monterey or later, and only on a Mac with Apple silicon or a Mac with the Apple T2 Security Chip. If this feature isn't available or doesn't work on your Mac:


If you need help, contact Apple Support."


We hope this helps.


Cheers!


Jan 18, 2023 9:52 PM in response to Claude Crider

There are 2 methods to securely wipe your SSD:


1. SSD Clean


ATA Secure Erase is a command which resets all the available SSD blocks to a "clean memory state". This process resets all the available blocks, and the SSD is marked as "clean".


2. Data Eraser Software


Sometimes ATA Secure Erase command isn't enough. Especially when you want to be 100% assured that your SSD won't be damaged and data cannot be recovered after the wiping operation. This is where professional file erasure software like BitRaser File Eraser comes into the picture. BitRaser File Eraser uses secure erasure techniques to wipe the contents from your SSD safely, beyond the scope of any recovery.


Further, I suggest you to check the below link for the process to erase data securely from an SSD:


Hope it will help!


[Link Edited by Moderator]

This thread has been closed by the system or the community team. You may vote for any posts you find helpful, or search the Community for additional answers.

Disk erase failed

Welcome to Apple Support Community
A forum where Apple customers help each other with their products. Get started with your Apple Account.